Personal finance spreadsheet template
In a short time I will start a new era in my life: I’ll move out of my parent’s house, share the rent of an apartment with some friends and live all by myself. Furthermore, I’ll be doing a full-time research master’s programme.
Therefore, I want to have as little “distractions” and inconveniences as possible, to concentrate on my studies. One thing that usually worries people a lot is money (particularly - managing their money). So I thought I could use my time before moving out to design a VERY NICE® personal finance spreadsheet, which would allow me to stay in control of my money while at the same time leave worries behind - leave the projections and calculations to someone who can do it with pleasure - A COMPUTER.
It turns out that this spreadsheet I designed and tested is SO NICE that I think it might even be useful to a lot of other people, specially students and other single people in general. One specific nicety of this spreadsheet is that it can have a date attached to every financial transaction (income or expense). Then, if you choose to schedule this (possibly future) transaction, it will appear in a Google Calendar defined by you :D
Here’s the link for the template, use it, modify it at will and enjoy:
Now, let me explain a bit better how you should use the spreadsheet and how it works:
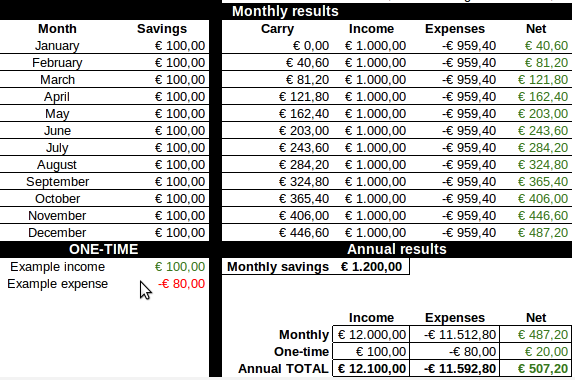
First of all, there are two main types of “views” in the spreasheet: the “year” sheet and the monthly sheets, which means, there’s one sheet for each month of the year, plus a “consolidated” view, with summarized data from all months. The “year” sheet is mostly not supposed to be edited (with some small exceptions which I’ll talk about later), and it shows, for example, income, expenses, savings and net cash flow for every month. It also has a space for you to include “ONE-TIME” annual transactions, such as taxes, etc. Here it goes, the “summary” part of the “year” sheet:

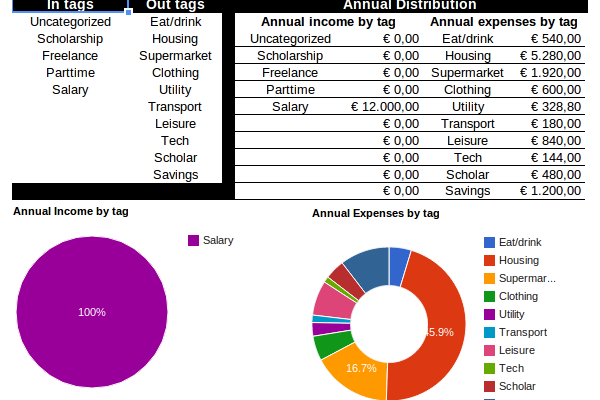
Another interesting feature of the “year” sheet (the MOST interesting, perhaps), is that it allows you to see the distribution of both your expenses AND income, according to tags defined BY YOU. You can see the absolute sums of money spent and acquired by tag, as well as percentages by tag for income and expenses. There it goes, another part of the “year” sheet:

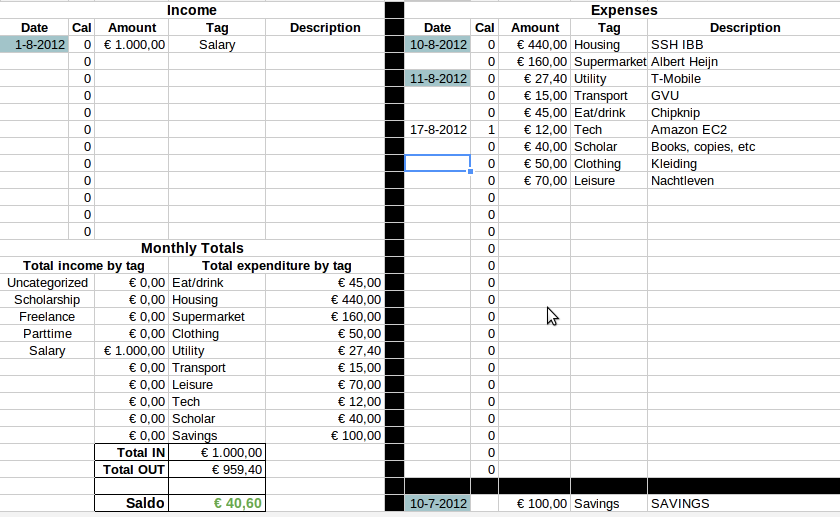
Of course, to have annual data about your income and expenses, you have to have all of transactions listed in a per-month basis, and that’s the role of the “month” view. Each month has a (pretty much identical) sheet, in which you put all the incoming and outgoing financial transactions that are related to that month:

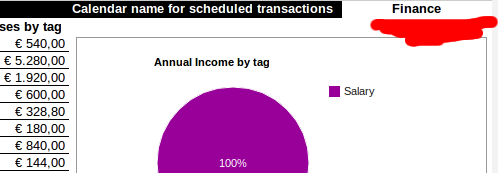
Each transaction (either income or expense) has an amount, a tag and a free-form description. Apart from that, each transaction can have a date. Remember what I said about transactions being scheduled? When the “Cal” column of a transaction is set to “1”, then a whole-day event will appear in a user-defined Google Calendar to represent that transaction. The name of the calendar in which you want to put your transactions must be written in a cell on the top-right corner of the “year” sheet, here:

To finish our “tutorial” about the personal finance spreadsheet template, that’s how the transaction scheduling works: every 10 minutes, the script included in the spreadsheet makes sure that all transactions you chose to be scheduled (by setting “Cal = 1”) are in the finance calendar of your choice. Alternatively, you can run the synchronization manually by using the menu “Scheduler - Schedule all new transactions”.
So… THAT’S ALL, FOLKS! ENJOY! :) Again, the adress of the template, if you wan’t to preview and/or use it: personal-finance-template
PS: By first time you run the synchronization script, you might have to authorize it to use your Google Calendar. Just click “OK” when asked and you should be good to go…
